285 Industrial Circle – Mifflintown, PA 17059

Toll Free: (877) 714-0415 | Local: 717-436-8883

Welcome to the Juniata Valley RV Blog

The Basics: RV Winterization at Home

How to Winterize Your RV at Home

Before you park your RV in winter storage, be sure to prep it with proper RV winterization. Prevent any damage in the freezing temperatures over the next few months, and protect it from cold critters looking for a warm place to hide. RV winterization will ensure that when the snow melts and the sun stays past 5 p.m. there won’t be any damage or furry surprises waiting for you.

What You Need to Winterize Your RV

There are a few basic tools and materials you need to winterize your RV. Luckily, we have most of these available in our parts store! You can stop by Juniata Valley RV to browse our parts store. If we don’t have what you need in stock, we can order it for you! Just let us know what you’re looking for.
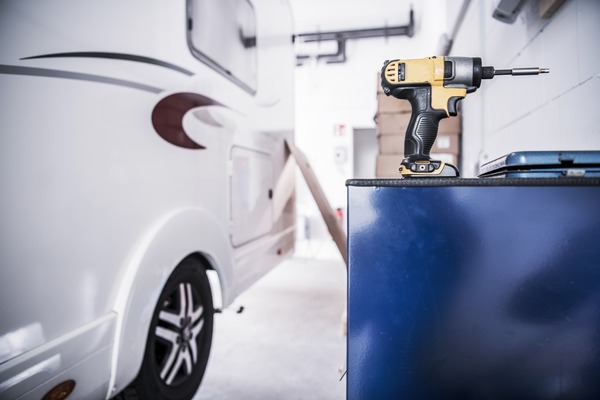
A drill next to a motorhome in a garage or service bay.
  • RV Antifreeze – Three to four gallons should be more than enough. But the amount you’ll actually use depends on the layout and length of your plumbing lines.
  • Water Heater Bypass Kit – If your RV isn’t already equipped with one.
  • Siphoning Kit – If the pump is not already equipped.
  • Cleaning Wand – To scrub your holding tanks until they’re squaky clean!
  • Basic Hand Tools – Some tools you’ll probably need include: power drill, crescent wrenches, needle nose pliers and a screwdriver. You also may need a flashlight!
  • Anode Rod – A plastic plug might also work.
  • Moth Balls & Mouse Repellant – They’ll keep critters and creepy crawlies under control over the winter. Who can blame them for wanting a warm place to sleep?

Winterize Your RV Water Systems

Flush the Water Tanks

The first thing you’ll need to do to winterize your RV is drain and flush the black and gray water tanks. You never want to leave wastewater in your water tanks over the winter. They’re a breeding ground for bacteria, and freezing water can damage tanks and pipes over the winter. Once they’re emptied of water, we recommend using a black tank cleaner to ensure your black tank is completely cleaned out and ready for winter storage.

Flush the Water Heater

All the water needs to be emptied for proper RV winterization. This includes your water heater! Start by turning off the water heater and allowing it some time to cool down. Then, hook your RV up to city water. Use a wrench to remove the anode rod and open the pressure relief valve so the water can drain out. After it’s drained, flush the heater out for a few minutes until any sediment has been removed. Leave the anode rod out during the winter, but be sure to replace it in the spring.

Bypass the Water Heater

Make sure to bypass the water heater before adding antifreeze to your RV. You want to make sure there’s no chance of antifreeze making it into your water heater. Some RVs will have a bypass already installed. If not, you can start the bypass by removing the water heater service door. Then, remove the access panel to get to the valves inside. Adjust these valves to manually bypass the water heater.

Winterize Your RV Exterior

Prep the Water Pump

Locate the water pump and attach the siphoning kit. Then, place the siphoning hose in the antifreeze. Open the valve and turn on the water pump to allow the antifreeze to flow through the water system.
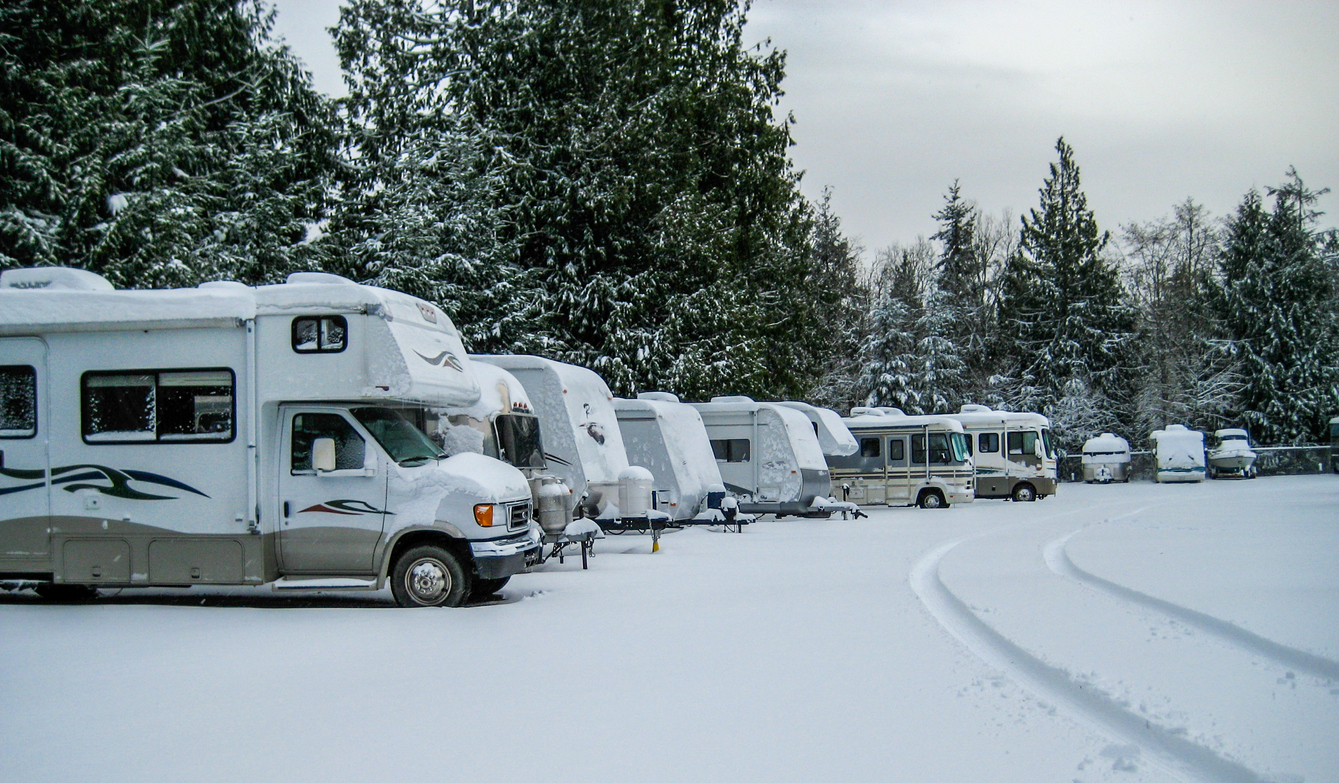
A line of motorhomes parked in the snow.
Open All External Faucets and Valves

You want to drain all the water from your RV before the freezing temperatures set in. Start by opening the lowest valve and work your way up, allowing the water to run out. Do this until you see the water change color, notifying you that the antifreeze has made it all the way through. Then, close and tighten the valve. Make sure to do the same with any external showers and faucets.

Winterize Your RV Interior

Flush Internal Faucets

RV winterization needs to be completed inside and out. Once you have put antifreeze in the water pump, open all interior faucets, showers and toilets. Let them run until the water changes color, signaling that the antifreeze has made it all the way through. Once you see antifreeze, you’re good to turn off the water for the winter.
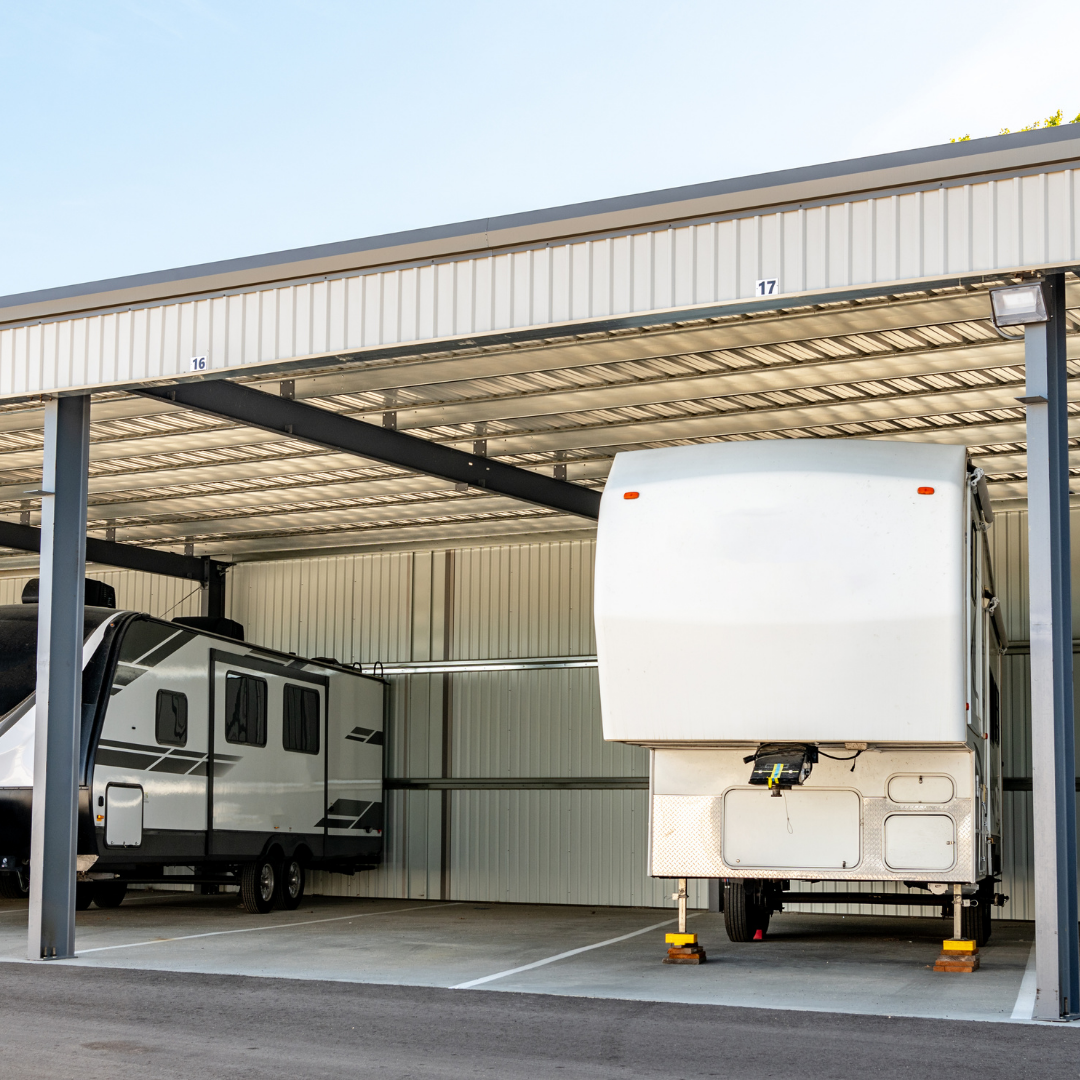
Two RVs in storage. In need of RV winterization.
Pour Antifreeze Down the Drains

Pour antifreeze down any interior drains to ensure they’re prepared to withstand freezing winter temperatures. Pour antifreeze down sink drains, shower drains and toilets.

Remove All Items from the Interior

The last step of RV winterization, at least the last step we’re covering today, is emptying the interior of any items that won’t last the winter. Remove all food, clothes and other important items from your RV before leaving it for the winter. Leave your refrigerator, cabinets and any other doors open to keep air flowing and prevent mold or smells from building up over the next few months.

Once you’ve taken these steps, the RV winterization basics are done! You’re ready to place your RV in its winter storage spot and rest easy for the holiday season. You know your RV is ready and waiting for another fun-filled camping season when the snow finally melts again.

If you’re interested in hiring an expert team to perform RV winterization for you, look no further than Juniata Valley RV! Our service team has winterized hundreds of RVs, and we’re happy to add yours to the list. You can also shop new and used RVs for sale, and start spring camping with a brand new rig. 

Need RV winterization service?

Let our RV service technicians handle the heavy lifting when it comes time to winterize your RV! Contact our service department to schedule your RV winterization today.

How to Plan the Perfect RV Road Trip: A Comprehensive Guide from Juniata Valley RV

From Driveway to Highway: Your Blueprint for the Perfect RV Road Trip

Embarking on an RV road trip is an exciting way to explore new destinations, create lasting memories, and experience the joy of the open road. Whether you’re a seasoned RV traveler or a newbie looking for a new way to travel, careful planning is key to ensuring a memorable and stress-free journey. In this comprehensive guide, we’ll provide you with valuable advice to make the most of your road trip, brought to you by Juniata Valley RV, your trusted Pennsylvania RV dealership.

Choose the Right Destination

The first step in planning an RV road trip is selecting the perfect destination. Consider your interests, preferences, and the experience you seek. Are you drawn to stunning national parks, scenic coastal routes, or historic landmarks? Research potential destinations and compile a list of places you’d like to visit. Check online resources, travel blogs, and RV forums for inspiration and recommendations. Aim for a mix of popular destinations and hidden gems to create a diverse and exciting itinerary.

A couple in their motorhome. The woman in the passenger seat helps set up the GPS.

Determine the Duration of Your Trip

Once you’ve chosen a destination or list of stops, consider the duration of your trip. Will it be a short weekend getaway or an extended vacation? Understanding the duration will help you plan your route, schedule activities, and allocate the right amount of time for each stop along the way. Be realistic about the time you have available and factor in travel time to ensure a well-paced and enjoyable trip.

Plan Your Route

Planning your route is part of creating a successful RV road trip. Consider both the scenic and practical aspects of your journey. Choose highways or byways that offer breathtaking views and interesting attractions along the way. Use online mapping tools and RV-specific navigation apps to help you find the best routes for your rig’s size and weight restrictions. Keep in mind the desired driving time each day and plan for rest stops and fueling stations along the way.

Research Campgrounds and RV Parks

Finding suitable campgrounds and RV parks is crucial to ensure a comfortable stay throughout your journey. Research different options along your route and book in advance, especially during peak seasons. Consider factors such as amenities, hook-up options, pet-friendliness, and proximity to attractions. Look for campgrounds with beautiful surroundings, convenient facilities, and positive reviews from other RV travelers. Websites and apps like Campendium, ReserveAmerica, and AllStays can provide valuable information and reviews to assist in your decision-making process. There are also some great places to stay for free overnight, like Walmart or Cracker Barrel parking lots.

Create a Realistic Budget

Before hitting the road, establish a realistic budget for your road trip. Consider expenses such as fuel, accommodation, meals, attractions, and any additional activities you plan to engage in. Leave room for unexpected costs and allocate your resources accordingly. Researching and comparing prices in advance can help you make informed decisions and optimize your budget.

Prepare and Pack Accordingly

Efficient packing is essential when traveling in an RV. Prioritize essentials such as clothing, toiletries, cooking utensils, bedding, and outdoor gear. Consider the weather conditions at your destinations and pack accordingly. Don’t forget to bring RV-specific items such as leveling blocks, water hoses, and electrical adapters. Make a checklist to ensure you have everything you need while avoiding overpacking and cluttering your living space. Organize your storage areas in the RV to maximize efficiency and accessibility during your trip.

Conduct RV Maintenance

Before hitting the road, ensure your RV is in optimal condition. Schedule a thorough inspection and service with Juniata Valley RV or a trusted RV service center in your area. Check the tires, brakes, engine, and all major systems. Test the appliances, including the refrigerator, air conditioning, and heating. Top off fuel, propane, and water tanks, and stock up on essential supplies. Regular maintenance ensures a safe and hassle-free journey. Don’t forget to pack basic tools and a roadside emergency kit to handle any unexpected situations. Our experienced RV service technicians can help with ensuring that your RV is ready to go if you’re in central Pennsylvania.

Perform Vehicle Maintenance

Ensuring your vehicle is in good working condition is crucial for a successful road trip. Of course, this is often more relevant if you plan to travel in a towable RV. Schedule a comprehensive maintenance check-up before departure, including oil changes, tire rotations, and brake inspections. Don’t forget to check your spare tire and ensure your vehicle’s fluids are topped off. Familiarize yourself with the basics of car maintenance, such as changing a tire or jump-starting a battery, in case of emergencies.

Create a Flexible Itinerary

While it’s good to have a rough itinerary, leave room for flexibility and spontaneous adventures. A rigid schedule can limit your ability to explore unexpected attractions or take detours to hidden gems. Be open to changing plans and embrace the freedom that RV travel offers. Allow for downtime to relax and enjoy the journey at a comfortable pace. Incorporate activities that align with your interests, such as hiking, fishing, or visiting local landmarks, but also leave room for leisurely exploration and relaxation.

Stay Safe and Practice Responsible RVing

Safety should always be a priority during your RV road trip. Research local traffic laws and regulations, particularly those specific to RVs. Take breaks when needed to avoid driver fatigue and plan rest stops at RV-friendly locations. Invest in safety equipment such as fire extinguishers, carbon monoxide detectors, and first aid kits. Respect nature and follow campground rules to preserve the environment for future travelers. Be mindful of wildlife, dispose of waste responsibly, and leave your campsite clean and tidy.

A couple smiling outside of their Class A motorhome.

Embrace the RV Lifestyle

An RV road trip is not just about the destination; it’s about embracing the RV lifestyle. Immerse yourself in the RV community by attending RV rallies, connecting with fellow travelers, and sharing experiences. Engage in outdoor activities, try local cuisine, and explore the unique charm of each destination you visit. Embrace the freedom, spontaneity, and sense of adventure that RV travel offers.

Planning the perfect RV road trip requires careful consideration and attention to detail, but the rewards are immeasurable. By following these essential steps, brought to you by Juniata Valley RV, you’ll be well-prepared to embark on an unforgettable journey filled with breathtaking scenes, exciting adventures, and cherished memories.

We have new RVs for sale to suit every traveler’s needs. Whether you’re a seasoned RVer or new to the world of RV travel, our knowledgeable staff can help you find the perfect RV to make your road trip dreams a reality. Visit our showroom or browse our inventory online to explore the latest models and find the one that speaks to you.

Start planning, pack your bags, and hit the open road as you embark on the perfect RV road trip. Happy travels!

Begin Your Adventure

Tips for a Smooth RV Campground Setup

Your Campsite RV Setup Checklist

Whether it is your first time setting up your campground or you’ve been camping for decades, there is always more to learn! As you start to create a camping trip checklist, the entire process will get easier. To make the most of your camping experience, it is important to set up your RV and campsite properly. Here is some advice for a smooth RV campground setup.

Choose the right campsite

This campground setup step starts before you hit the road. When you make your reservation, you can check the status of hookups, campsite sizes and the location within the campground to start. Of course, you’ll need to choose a site that is the right size for your RV. You can also check for sites that include full hookups, have easy access, and are located near the amenities, such as restrooms and showers if needed.

Before you leave the house, make sure to call the campground and ensure that you have your reservation and that everything is scheduled as planned. When you arrive, you can follow these steps to make your campground setup as smooth as possible!

Couple relaxing at camp after a complete campground setup. Man at campfire and woman using digital tablet on picnic table.

Find your campsite within the campground

If you need help, grab a map, or ask someone at the main office. As you approach your site, make sure you assess the space before parking. Check out where the connections are for all your RV hookups. Determine if you can drive into the space, or if you need to back up.

Also, keep your outdoor campground setup in mind. Do you have an awning, outdoor furniture or a dog pen? If you need assistance, there are usually people around that can help you with angling the RV or help with directions to your specific spot.

Check for hazards

Before fully setting up your RV, take a walk around the campsite and look for any potential hazards such as low-hanging tree branches, large rocks or roots, or uneven ground. It is important to make sure your RV is on a level surface to prevent any issues with appliances, like your refrigerator or stove, or any leaks in your water system.

Park your RV

You can check out the campsite and see what the best option would be: for you to pull through or back up. When you park your RV, make sure to leave enough space for the other campers to maneuver their vehicles. You should also be mindful of the wind direction, as this can impact your RV’s stability. Again, once parked, step outside and make sure there’s room for awnings, slide outs and any other outdoor equipment you plan to set up.

Connect your RV to utilities

Once you’ve parked your RV in the right spot, the next campground setup step is to connect your RV to the campground’s utilities. This can include water, electricity and sewage, depending on the campground and campsite. Follow the manufacturer’s instructions to safely connect your RV to these utilities and be sure to turn off any electrical devices before connecting or disconnecting.

Level and stabilize

Before you start to unload items in your vehicle or RV, you want to make sure that you are on level ground. Now is the time to set up your leveling system. Leveling your RV will help stabilize it and make it more comfortable to live in. Use leveling blocks or pads to ensure your RV is on a level surface. Most new RVs come with an automatic leveling system to make this process easier.

Stabilizing jacks also come into play at this step in the campground setup process. The jacks can help to stabilize your RV while you are parked so you know you will stay put.

Without level ground, you will not be able to use your awnings and you could experience shifting inside the RV which can be dangerous. It can also be frustrating when you are relaxing or trying to sleep. This is a crucial part that you should practice when you go through your routine campground setup.

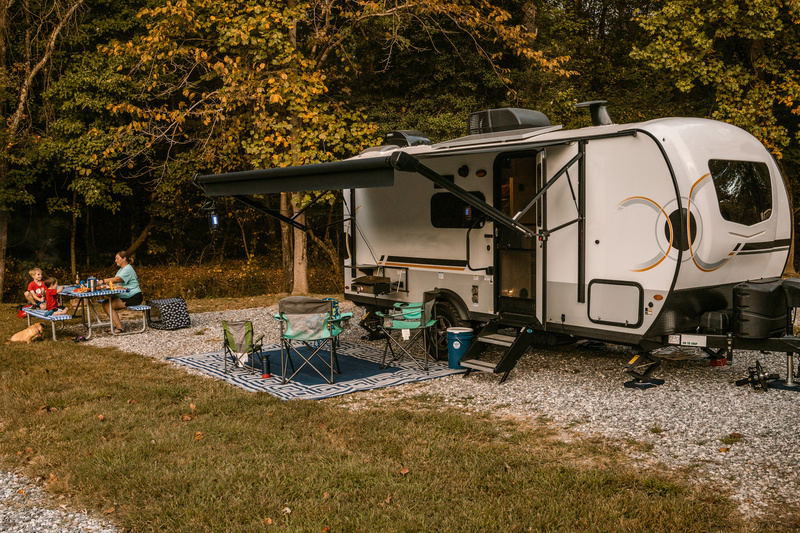
Travel Trailer set up at a gravel campsite where proper leveling was needed.

Hook up your power source

What is a camping trip without power? Well, for some, that is the only way we camp! But not everyone enjoys the primitive ways of camping. With RVs, you can enjoy camping in luxury.

Power sources allow you to have electricity, cook, and use other devices. Solar panels are another option that can help you with power throughout your trip, but a generator is a safer bet when you’re traveling. As soon as you hook up your power source you know you can relax in your cool RV, plan your first meal and start unpacking.

Figure out your water and waste

This campground setup step is not the most fun you will have, but it is entirely necessary. A water source and waste plan will allow you all to be on the same page, and you can create your list of dos and don’ts for the family. Time to throw on some gloves and get started.

Hook up the water regulator to your water supply so you can use your water filtration system at the end of your tank. If you own a sewer support system, you can hook it up with a slope going from the RV to the sewer connection spot. You then can turn on the tank (making sure it has water in it). Check that the connection is SEALED. You will thank us later for this one, and so will your neighbors.

Set up all the extras

Now we get to the finishing touches of your perfect campground setup! As you are inside unloading the dishes and getting things ready for the week, you can also start setting up the outside area. This can mean the awnings, lawn chairs, your fire pit, dog pen and more. There are so many things you can add to your campsite to make the trip even better! One thing to remember: make sure to always have an eye on the radar. With strong winds or heavy rain, your things outside can easily blow away. So, make sure to have a plan for that and keep an eye on the weather around you!

If your RV has an awning, make sure to secure it properly to prevent any damage from the wind.

Check your RV appliances

 Once you’ve set up your RV, check all of your appliances to ensure they are working properly. Turn on your stove, refrigerator, and other appliances to make sure they are functioning as expected.

Familiarize yourself with the campground

Take a few minutes to explore the campground and get familiar with the facilities and amenities available. This will help you plan your stay and make the most of your time at the campground.

You don’t have to wait until you get to the campground to go through all these steps for a smooth campground setup. Make sure to practice at home so you get everything down and have the confidence to do so out at the campground. This will also cut down significant time while you are setting up. Go over specific tasks with your family and friends so each person knows the plan and knows what they are responsible for! We hope these tips help you with your next trip!

In need of a new RV to take on a camping trip this season? Stop by Juniata Valley RV! We’re located in Mifflintown, Pennsylvania, and we’ve got towable RVs and motorhomes in stock! Browse our new RVs for sale and used RVs for sale on our website, then stop by in person when you’re ready to take a tour. Our team will help you find a great price on a new RV to take you on new adventures.

Begin Your Adventure

RV Tips for Beginners

RV Tips for First-Time Campers

Camping is an exciting way to get outside, disconnect from the digital world, and immerse yourself in nature. If you’ve never been camping before, the idea of packing up for a trip to the great outdoors can be a little intimidating. Though it can be overwhelming if you don’t know what to expect or how to prepare, going camping for the first time can be a rewarding experience. To help you have a successful first-time RV camping trip, here are some RV tips to keep in mind.

Plan Ahead

Before embarking on your RV camping trip, make sure to do your research and plan ahead. This includes choosing your destination, booking your campsite, and mapping out your route. Check the weather forecast and pack accordingly. There are plenty of online resources and apps you can check for RV tips and other advice to plan your trip.

Choose the Right RV

It’s essential to choose the right RV for you and your family so you can have a comfortable and enjoyable trip. Make sure to consider the size of your group, your budget, and what’s most important to you when you select your RV. At Juniata Valley RV, we have new RVs for sale from top brands like Winnebago and Aliner. Our team can also help with RV tips or answer any questions you have when you visit our dealership!

A person follows our RV tips as she packs a suitcase for a camping trip.

Pack Smart

Once you’ve chosen your destination, it’s time to plan what you need to pack. Make a list of the gear and equipment you’ll need, and check it off as you pack. Make sure to include essentials like food, toiletries, a first-aid kit, and weather-appropriate clothing.

It’s important to dress for the weather and the activities you’ll be doing. Bring layers, as temperatures can fluctuate throughout the day and night. Make sure to wear appropriate footwear for hiking and walking on uneven terrain. And be sure to bring enough food and water for your entire trip, or research places to eat near your chosen campground.

Stay Safe

While camping can be a fun and relaxing experience, it’s important to be prepared and stay safe. Make sure to bring a first-aid kit, insect repellent, and sun protection. Follow all safety guidelines and regulations at the campsite. Accidents can happen, so one of our top RV tips is to ensure you have a properly stocked first-aid kit and other emergency essentials. This should include bandages, antiseptic, pain relievers, and any necessary prescription medications.

Get Familiar with Your RV

If you’re not used to driving or parking an RV, make sure to practice before you hit the road. You don’t want to be caught off guard by tight turns or narrow paths. It’s also important to know the height of your RV and be aware of low bridges or overpasses.

Aside from driving, you should take time to familiarize yourself with your RV’s functions and features. This includes understanding how to operate the RV’s systems, like the water and electrical, and how to hook up to the campsite’s utilities.

Choose the Right Campsite

One of the most important RV tips for first-time RVers is to take the time to research campgrounds and choose the right site. Consider the amenities you’ll need, such as bathrooms or potable water, as well as the type of camping experience you want to have. Do you want to camp in a quiet area or by the campground facilities? Would you prefer a more rustic or developed campsite?

Different campgrounds and campsites will also have different rules about which campers can be accommodated. Campsites will often have restrictions on what size RV they can accommodate. Additionally, some campgrounds have restrictions (like age of the RV) on which campers can be brought to their properties.

Respect the Campground and Local Wildlife  

When you arrive at your campsite, make sure to read and follow the campground’s rules. This includes respecting quiet hours, keeping your campsite clean, and properly disposing of waste.

As a camper, you’re a guest in nature. Respect the environment by leaving no trace of your presence. This means packing up all trash and avoiding damaging plants or wildlife. Use designated campfire areas and follow fire safety rules.

A father and his young daughter smile as they enjoy the outdoors together.

Enjoy the Experience

Most importantly, have fun! RV camping is a great way to experience the great outdoors and spend time with family and friends. Take advantage of the opportunity to unplug and relax. Embrace the camping experience. Try new activities and take time to explore the outdoors! Leave your electronic devices behind and take the opportunity to disconnect and recharge.

Going on an RV camping trip for the first time can be a little intimidating, but with some planning and preparation, you can have a fantastic experience. By following these RV tips, you can make the most of your first RV camping trip and create memories that will last a lifetime.

If you need an RV to take on your first trip, check out our inventory of new and used RVs for sale at our Pennsylvania RV dealership! We have towable and motorized campers on our lot, as well as an expert team ready to provide RV tips and show you how to use all your camper’s features. Visit us in person, give us a call or contact us online to get started!

Begin Your Adventure

RV Solar Panels – Everything You Need To Know

Guide to RV Solar Panels

If you’re an avid RVer, especially one who enjoys boondocking and remote campsites, you know that having a reliable source of power is essential. This is where RV solar panels come in. RV solar panels are a great investment for anyone who wants to travel off-grid and still have access to electricity. In this blog post, we’ll go over the benefits of solar panels for your RV, how they work, and what you should look for when purchasing them.

How RV Solar Panels Work

Solar panels work by converting the sun’s energy into usable electricity. They do this using photovoltaic cells, which are made of silicon and other materials that absorb sunlight and convert it into electrical energy. The electricity produced is direct current (DC), which can be used to power your RV’s appliances and devices or stored in batteries for later use.

The photovoltaic cells are arranged in a solar panel, which is usually mounted on the roof of an RV. The panels are connected to a charge controller, which regulates the flow of electricity to the battery bank. The battery bank stores the energy produced by the panels, so you can use it later when the sun isn’t shining.

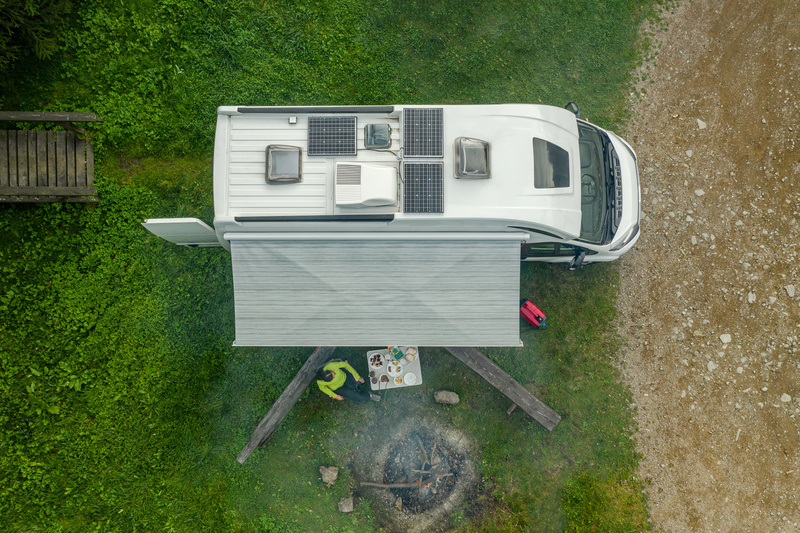
Aerial view of a camper van with RV solar panels set up at a campsite.

When you need to use the electricity stored in the batteries, it’s converted to alternating current (AC) by an inverter. AC power is what most RV appliances and devices use, so the inverter is essential for making the energy usable.

Benefits of RV Solar Panels

There are several benefits to RV solar panels. Firstly, solar panels allow you to generate your own electricity, reducing your reliance on traditional power sources. This can be especially beneficial when traveling to remote areas where traditional power sources are not available.

One of the most significant benefits of solar panels is that they offer a clean and renewable source of energy. Solar panels don’t produce any harmful emissions, which means that you can enjoy your travels without harming the environment. Additionally, solar panels can help reduce your reliance on fossil fuels and save you money on fuel costs.

They can also save you money in the long run. Although the initial investment can be high, solar panels can help to reduce your energy bills over time. Additionally, they require little maintenance and can last for many years, making them a worthwhile investment.

Another benefit of RV solar panels is that they are incredibly versatile. They can be used to power a wide range of appliances, including lights, fans, and even televisions. This means that you can enjoy all the comforts of home with renewable energy. Additionally, solar panels can be used in remote locations where traditional power sources aren’t available, giving you the freedom to explore off-grid.

How to Choose RV Solar Panels

There are quite a few factors to take into consideration when it comes time to choose which solar panels you’ll install. The power your RV needs, the panel types and your budget are all important considerations. Here’s how to narrow down your options:

Power Requirements

The first factor to consider when selecting solar panels for your RV is your power requirements. The amount of power you need will depend on the size of your RV, the number of appliances and devices you have, and how often you plan to use them. Make a list of all the devices and appliances you plan to power with your solar panels and add up their wattage requirements. This will give you a rough idea of how many watts of solar power you’ll need.

Panel Size and Configuration

The size and configuration of your solar panels will also be a key consideration. If you have a large RV or plan to use a lot of power, you may need larger solar panels or multiple panels. Smaller RVs or those with lower power requirements may only need a single panel. In addition, you’ll need to consider the orientation and angle of your panels to ensure maximum sunlight exposure. Ideally, your panels should be installed at a 30-degree angle facing south (in the Northern Hemisphere) for optimal performance.

Panel Type

There are several types of solar panels to choose from, each with its own benefits and drawbacks. The most common types of panels are monocrystalline, polycrystalline and thin-film. Monocrystalline panels are the most efficient and durable but are also the most expensive. Polycrystalline panels are less expensive but also less efficient. Thin-film panels are the least expensive but also the least efficient and durable.

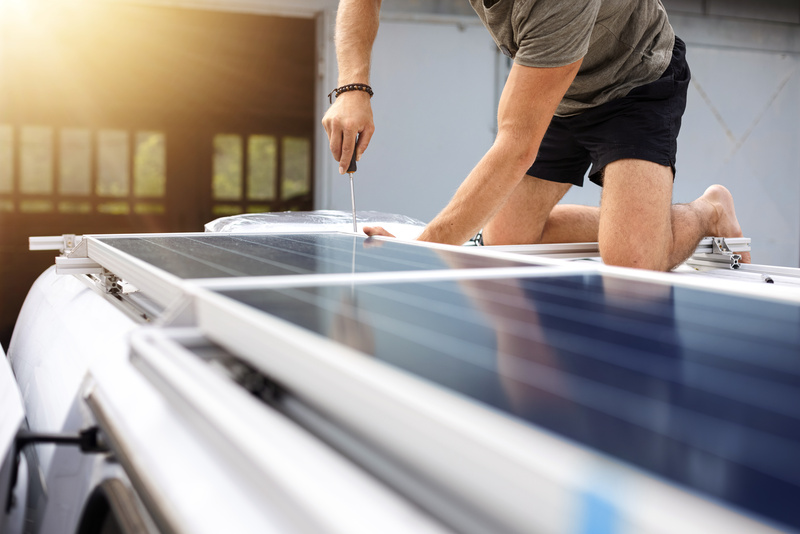
A person installs solar panels on the top of their RV.

Mounting Options

Another key consideration when selecting solar panels for your RV is how they’ll be mounted. There are several ways to mount solar panels on an RV, including roof-mounted, ground-mounted, and portable options. Roof-mounted panels are the most common and are generally the most efficient, but they can be difficult to install and may require modifications to your RV. Ground-mounted panels are easier to install but may take up valuable space on your campsite. Portable panels are the most versatile but may require additional equipment such as stands or brackets.

Budget

Finally, you’ll need to consider your budget when you select solar panels for your RV. Solar panels can be expensive, and the cost can vary widely depending on the type and size of the panels. In addition, you’ll need to factor in the cost of installation and any additional equipment such as charge controllers, inverters and batteries. Consider your budget carefully and try to strike a balance between cost and performance.

RV solar panels have become an increasingly popular option for those who love to hit the road in their recreational vehicles. Whether you are a full-time RV traveler or someone who enjoys the occasional weekend getaway, solar panels can be a game-changer for your lifestyle. You can shop new RVs for sale that either have solar panels installed or are solar-ready at Juniata Valley RV! If you’re looking for fuel-saving fold-down campers or teardrop campers for sale in Pennsylvania, we are one of the best dealerships to visit! We have tiny campers from top brands like Aliner and nuCamp at competitive prices. Browse our RVs online or stop in to see what we have in stock!

Begin Your Adventure

How to Perform a Spring RV Inspection

Guide to Seasonal RV Maintenance

As the weather warms, the time comes to uncover your camper and get ready for camping season! After long, cold months in storage, a spring RV inspection is often necessary. Before you head to the first campground of the season, you’ll want to make sure your RV is clean and ready to go. Avoid RV breakdowns and campground headaches: check out these tips for taking your RV out of winter storage before you get back on the road!

General Inspection

Before you get to the more detailed steps, it’s a good idea to check that all the basics are covered. This includes your power source, doors, windows, and propane. Confirm that all of these are functional before digging deeper into your spring RV inspection. If you run into issues with any of these, it’s likely time to consult the RV service technicians at Juniata Valley RV’s service department.

A woman seals the RV interior with caulk.

Electrical Checkup

After you’ve confirmed your RV’s power source is functional, it’s time to check individual power outlets. With the right tools, troubleshooting outlet issues can be a pretty simple process. First, check the generator circuit breaker(s) and reset. Next, check outlets and reset after you turn on the generator. We sometimes have to do that to get the outlets to work.

If you’re still having trouble, recheck and reset all your 120 Volt breakers in the main house panel after you turn on the generator. Check for power when you leave the generator. If the outlets still do not have power, the diagnosis may involve a power transfer switch. If so, contact our service department so we can help you get this fixed right away.

Sealing Leaks and Cracks

It may not seem like a big deal, but during a spring RV inspection you’ll want to check for leaks and cracks that may have occurred during the off season. Moisture can seep in over the winter and create an RV owner’s nightmare: mold! Make sure to check all windows for old caulk. If needed, remove and repair the area with new caulk after. If it’s going to rain, wait until you know you’re going to have clear weather for at least 24 hours to ensure a clean, dry repair.

Check the Tires

After months in storage, your RV tires are likely deflated. Before you hit the road, you need to do this essential step in RV dewinterization. Driving an RV, or even towing an RV, on underinflated tires can be dangerous, possibly leading to a blowout or an accident. You should use a tire pressure gauge to check PSI and reinflate your tires to the manufacturer’s recommendations. You can search these recommendations online or consult your owner’s manual.

Aside from reinflating, you should inspect your tires for overall quality. This includes checking for cracks in the sidewall and examining the tread. If your tires look worn down, it’s a good idea to replace them before the camping season starts.

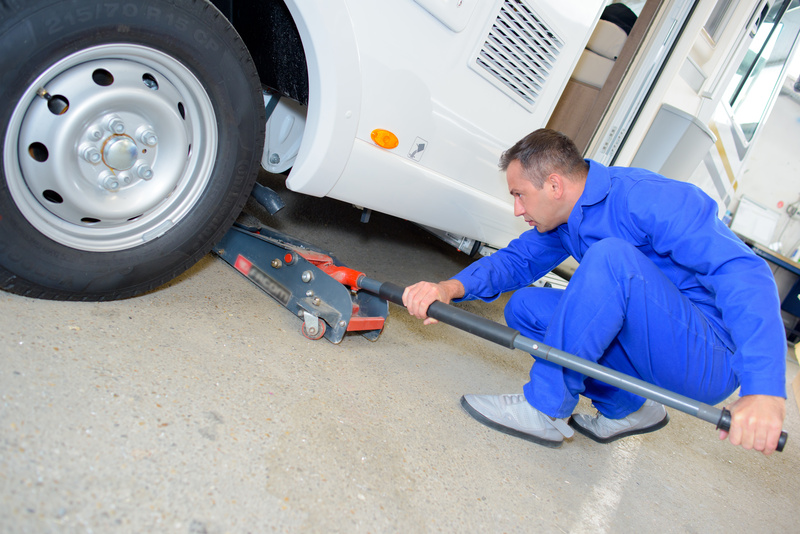
RV mechanic pushes jack under vehicle.

Wash and Inspect the RV Exterior

The last step to a spring RV inspection is a wash and wax. You can use a mild car washing soap, a big sponge for scrubbing and a microfiber towel to wipe down your RV. A thorough wipe-down to dry off the RV can prevent water marks. Make sure you wash the roof, the wheels, windows and panels. Check awnings for mold growth or tears as you may want to replace them before hitting the road. Once you’re done with the wash and dry, apply a generous coat of wax to get that like-new shiny look.

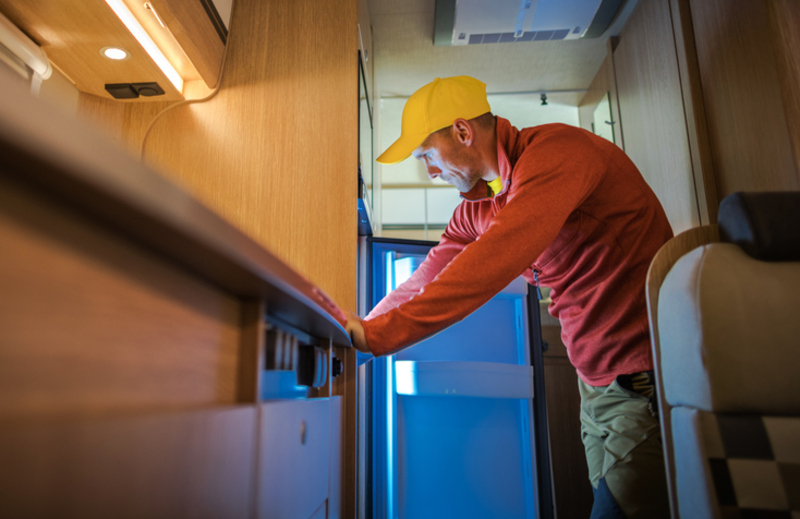
Man opens a camper fridge during a spring RV inspection.

Clean and Inspect the Interior

Your RV is probably stuffy and full of stale air after months closed up in storage. You can start your interior inspection by opening all the doors and windows, which allows your RV to air out. While you do this, you can also clean any dust or dirt that settled on the surfaces, as well as vacuum the floors.

We recommend opening the fridge and cabinets as well to let them air out. You should keep an eye out for any unwanted settlers who may have taken refuge in your RV during the winter, like spiders, mice and squirrels. Finally, check your ceiling for discoloration, which may be a sign of leaks.

Getting Back on the Road

Juanita Valley RV has an array of supplies you may need for repairs including awning accessories, plumbing supplies, a variety of vent covers, light bulbs, drain hoses and so much more. If you’re ready for a new RV this spring, you can contact us for a fair trade in. Browse new RVs for sale on our website, and stop in, give us a call, or contact us online when you’re ready to find out more!

Begin Your Adventure

Subscribe To Our Newsletter

Subscribe To Our Newsletter

Join our mailing list to receive the latest news and updates from our team. You'll get camping tips, featured units, special events, and more...

You have Successfully Subscribed!